

Quickstart
This guide walks you through creating your first webhook subscription and receiving webhooks.
There are two ways to subscribe, depending on how your integration is set up:
OAuth app
ℹ️ Recommended for most integrators. A single subscription delivers events for every company connected to your app.
1. Get an access token
Use the client credentials grant to get an app-bound token. Since it isn't tied to a specific company, the subscription will deliver events for every company connected to your app.
curl -X POST https://app.pennylane.com/oauth/token \
  -H "Content-Type: application/x-www-form-urlencoded" \
  -d "grant_type=client_credentials" \
  -d "client_id=YOUR_CLIENT_ID" \
  -d "client_secret=YOUR_CLIENT_SECRET" \
  -d "scope=companies:webhook_subscriptions:all"
Your OAuth app must be authorized for the
companies:webhook_subscriptions:allscope. If you get403 Forbidden, contact the Pennylane team to have it added.
2. Create the subscription
curl -X POST https://app.pennylane.com/api/external/v2/webhook_subscriptions \
  -H "Authorization: Bearer YOUR_ACCESS_TOKEN" \
  -H "Content-Type: application/json" \
  -d '{
    "callback_url": "https://example.com/webhooks",
    "events": ["dms_file.created"]
  }'
For more details on how to manage your webhook subscriptions — see Subscribing and managing Webhook subscriptions.
For the full list of available events — see List of webhook events.
3. Store the secret
The response includes a secret. It is returned only once so please store it securely.
4. Verify incoming requests
Use the secret to validate the HMAC signature on each delivery — see Receive and verify webhooks.
Company developer token
For single-company setups. The subscription delivers events for the company the token belongs to.
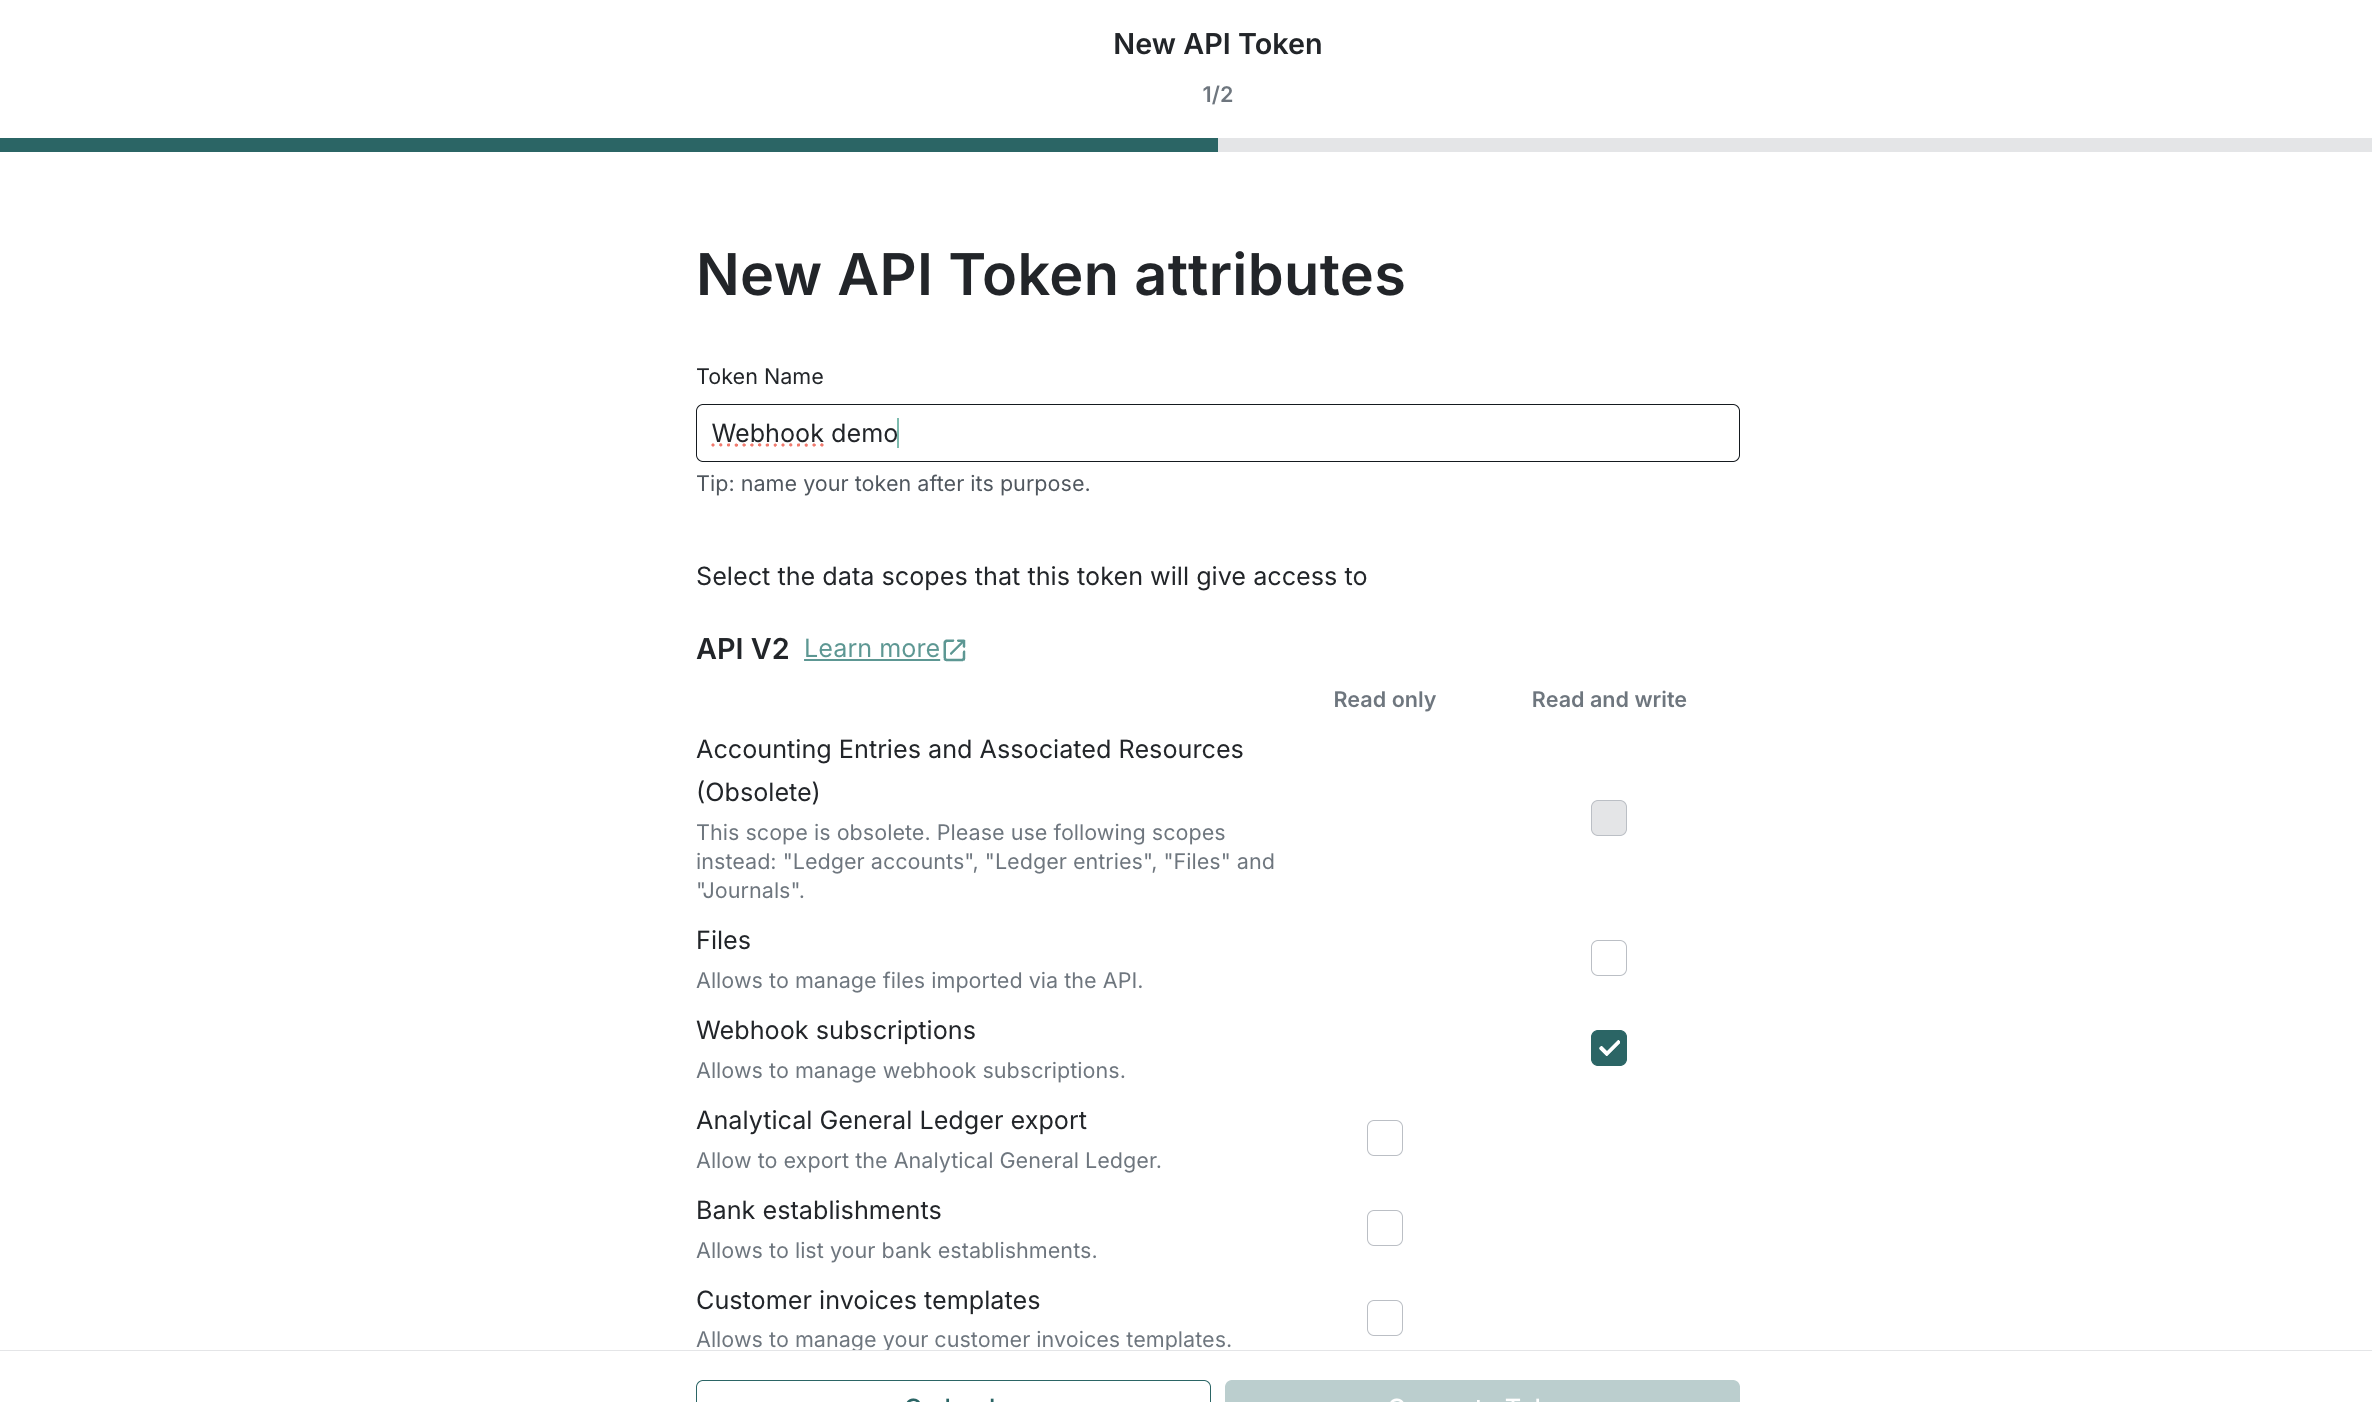
1. Create a token with the companies:webhook_subscriptions:all scope
companies:webhook_subscriptions:all scopeIn Pennylane, go to Company Settings → Connectivity → Developer tokens and create a new token. Enable the Webhook subscriptions scope along with any scopes that are required to subscribe to the events you need.
Scopes can't be changed after creation. If your existing token doesn't have the scope, create a new one.
2. Create the subscription
curl -X POST https://app.pennylane.com/api/external/v2/webhook_subscriptions \
  -H "Authorization: Bearer YOUR_DEVELOPER_TOKEN" \
  -H "Content-Type: application/json" \
  -d '{
    "callback_url": "https://example.com/webhooks",
    "events": ["customer_invoice.e_invoicing_status_updated"]
  }'
For more details on how to manage your webhook subscriptions — see Subscribing and managing Webhook subscriptions.
For the full list of available events — see List of webhook events.
3. Store the secret
The response includes a secret. It is returned only once so please store it securely.
Then set up your endpoint to validate incoming requests — see Receive and verify webhooks.
Note on delivery scopes
The
companies:webhook_subscriptions:allscope lets you manage subscriptions. To receive deliveries for an event, your token also needs the resource scope for that event (e.g.customer_invoices:readonlyforcustomer_invoice.e_invoicing_status_updated). This is checked at delivery time, not at subscription creation.
See Subscriber types and company scoping.
Updated about 2 months ago